

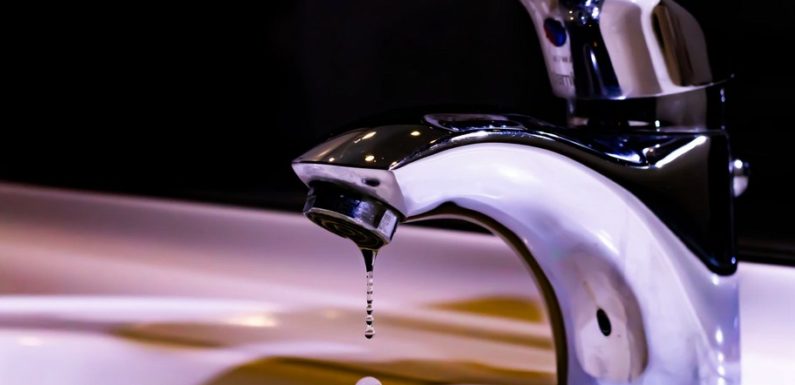
There are two main types of faucets: cartridge faucets and compression faucets. You can fix leaks in either type. Before trying to fix a leak, always shut off the water to the fixture and drain the pipes by opening the faucet. When the water ceases to flow from the spout, you can start fixing the leak.
Table of Contents
Cartridge Faucets
Most cartridge faucets have a single handle. When you adjust the handle, a cartridge in the body of the faucet moves up and down or left and right, controlling the amount and temperature of water that flows to the spout. The illustration below shows the parts of a typical cartridge faucet, though you should be aware that the internal mechanisms of different cartridge faucets can vary quite a bit.
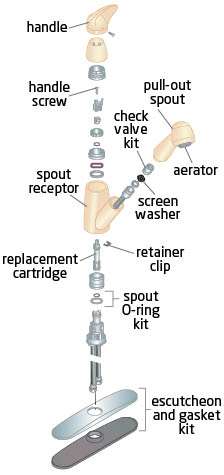
Cartridge Repair Kits
You can buy cartridge repair kits that contain the parts of a cartridge, such as O-rings, that need replacement most often. Cartridge repair kits are made for specific brands and models, so make sure you buy the right kit for your faucet. The kits usually come with detailed installation instructions and tend to cost about $20.
General Method for Repairing Cartridge Faucets
Since the internal parts of cartridge faucets often differ, always follow the instructions on your repair kit. The steps below will give you a general sense of the cartridge faucet repair process:
- Remove the handle: To access the faucet, first remove the handle. The handle is usually attached to the faucet with a screw, called the handle screw, which may be concealed by trim or a cap. The cap itself may be held in place by a small screw.

- Remove the retainer clip: On many cartridge faucets, the cartridge is held in place by a U-shaped piece of metal called a retainer clip. To pull out the retainer clip, use a pair of needle-nose pliers to grip the clip on its rounded end and tug it free carefully.
- Remove the cartridge: Wrap a bit of tape around the jaws of a pair of snub-nosed pliers to keep from damaging the cartridge. Grasp the tip of the cartridge with the pliers to free the cartridge from the faucet body. You may have to wiggle it a bit to free it from the socket body.

- Replace O-rings: O-rings are small black rubber donuts that fit onto the cartridge. Pry off the old O-rings. Lubricate the new O-rings from the cartridge repair kit using petroleum jelly or the lubricant in the repair kit, then roll the O-rings along the cartridge into the correct grooves.
- Reinstall the cartridge and test it: Reinstall the cartridge by following the disassembly directions in reverse order. Then turn on the faucet. If it’s still leaking, you’ll have to get an entirely new cartridge and install it (make sure to get the right cartridge for your faucet). Also check the hot and cold water; if they’re reversed, disassemble the faucet and rotate the cartridge one half turn.
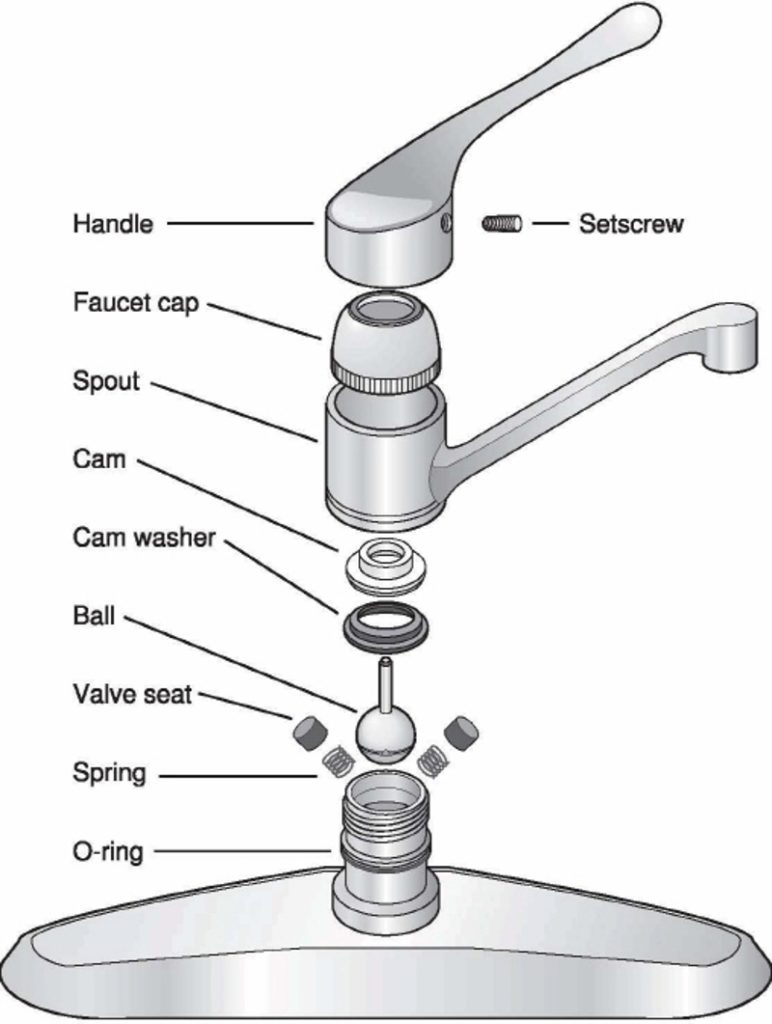
Compression Faucets
Compression faucets, often called seat-and-washer-faucets, have two handles that individually control the flow of either hot or cold water. As the faucet handle is rotated left or right, a valve stem rises or lowers to regulate the amount of water that passes through the spout. A rubber seat washer on the end of the stem presses against the valve seat in the base of the faucet body to stop the flow of water when the handle is turned off. An O-ring on the stem prevents water from coming up through the handle.

How to Repair a Compression Faucet
You can diagnose the problem in your compression faucet based on the location of the leak:
- If water drips from the spout even though the handles are off: The problem is most likely the seat washer.
- If water leaks from the handle: The problem is probably the O-rings.
In either case, you should:
- Turn off the water to the faucet.
- Remove the handle: Use a screwdriver to unscrew the handle, then lift it away. You may have to lift or pry off a trim cap that conceals the screw before you can remove the screw itself.

- Remove the valve stem: Use an adjustable wrench to loosen the packing nut that holds the valve stem in place. Then lift the valve stem away from the faucet body.
Replacing O-Rings
If you suspect that the problem lies with the O-ring, pry off the old O-ring, lubricate a new one, and roll it into place.
Replacing the Washer
If you suspect that the problem is with the washer:
- Remove the washer: Hold the stem in one hand and use a screwdriver to loosen the washer screw. If the screw is stubborn, lubricate it with a few drops of penetrating oil, such as WD-40, and let it sit for 15 minutes before trying again. In some cases, it may also help to reinstall the handle on the stem for better leverage. Once you’ve removed the screw, pry out the old washer.
- Install the new washer: Replace the washer with an identical washer—you may have to take the old washer to the hardware store to ensure you get the right replacement. Position the new washer and install the retaining screw.

- Test: Reassemble the faucet, turn the water back on, and test the faucet. If it still drips when it’s turned off, you may need to replace the valve seat.
How to Replace the Valve Seat
To check the valve seat for damage and, if necessary, replace it:
- Turn off the water.
- Remove the handle and stem.
- Insert a finger into the faucet body and run your fingertip gently around the lip of the seat, which should feel smooth and level. If you feel burrs or scratches, replace the seat.
- Use a seat wrench to remove the valve seat. One end of the wrench should fit the seat in your compression faucet. You may need to use quite a bit of the leverage, using the wrench’s L-shaped handle, to loosen and remove the valve seat.
